What Do The 3No LED’s Indicate?

This Knowledge Base document is where we can track our customer feedback and use the information to improve our product support documents.
Q: This Ladybird has been out of action for a while according to the dashboard.
In the field, I power cycled it. I saw the standard two LED display briefly and then a seemingly random flashing of all 3 LEDs. I concluded that there was nothing that I could do on site and so I replaced it with a fresh unit and brought it away.
I assume that I need to return it to you for a replacement?
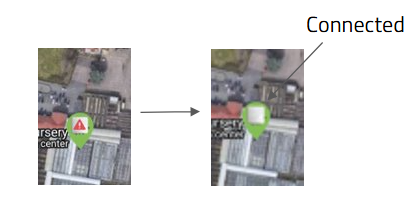
A: The flashing of the 3 LED lights is normal behaviour.
After connecting you will see that happen a few times (about 30 seconds apart) to signal that the ladybird is successfully communicating to the gateway - after connection the ladybird is communicating with a frequency of 30 seconds for a little while to get a bit of data to start with and then going to normal behaviour of 10 minutes comms and lights off to save power.
Ladybird activation
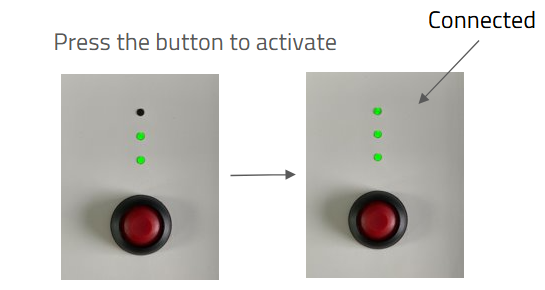
Press down the red push button to turn on the device.
The first 2 LEDs will become “Green”, signalling that the power and the internal sensors self-test has been successful. Wait for the third LED to become “Green”. The ladybird is now installed and the wireless link has been established successfully.
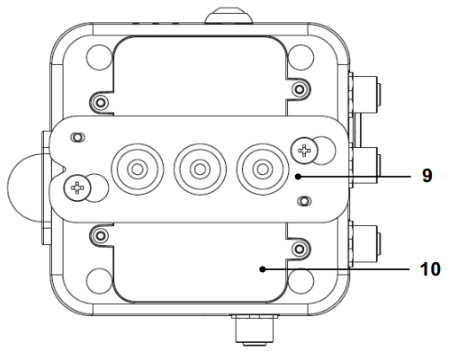
To replace the batteries in the device.
a) Remove the wall mounting plate (9) and remove the four screws to take the battery cover off (10)
b) Replace the 6 AA batteries with good quality batteries.
c) Replace the battery cover back in position and tighten the four screws.
Note: There is no need to tighten the screws too much. Make sure that the O-Ring is
in place to ensure waterproof.