
How to set up a Tipping Bucket Rain Gauge

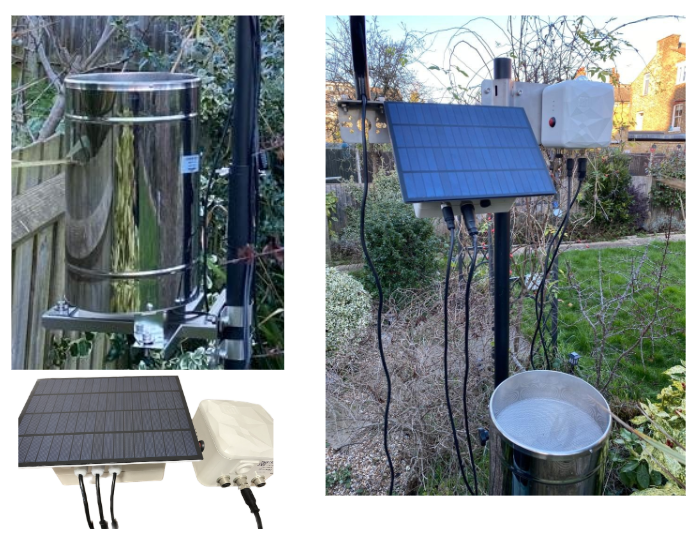
Rain Gauge installation.
-
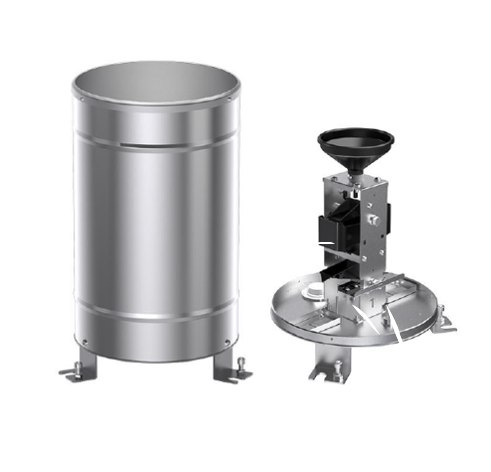
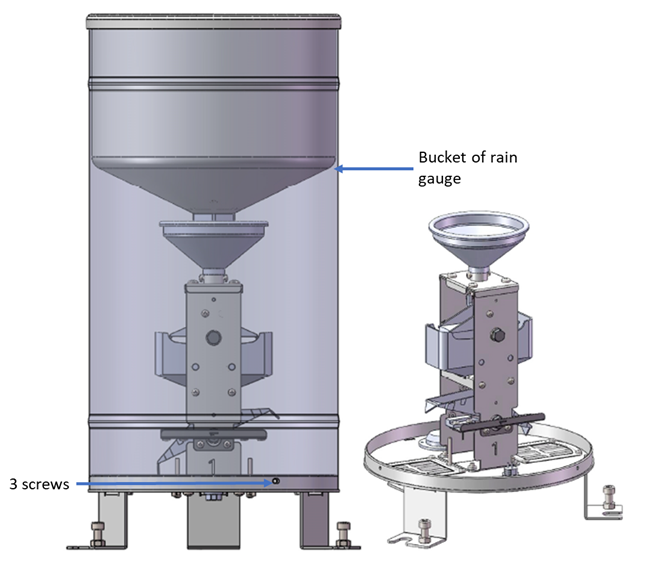
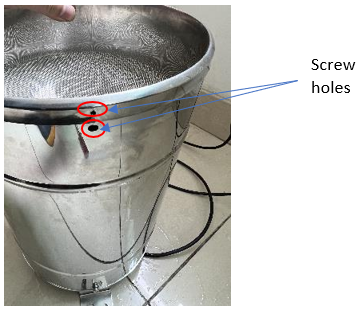
Loosen three screws and remove the bucket of rain gauge.
-
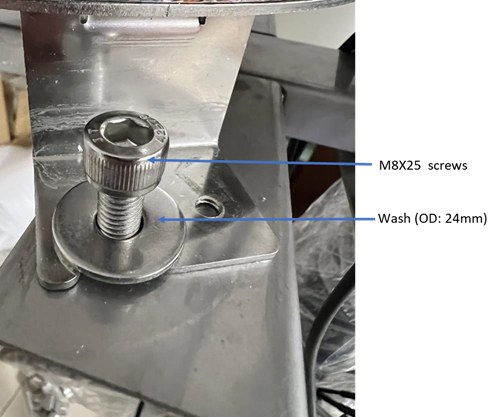
Put the rain gauge without bucket onto the rain gauge bracket and align 3 slots of legs of rain gauge with 3 screw holes of rain gauge bracket. Install the rain gauge with 3 M8X25 screws and larger washers (OD: 24mm). Remark: Do not tighten these three screws before levelling adjustment.)
-
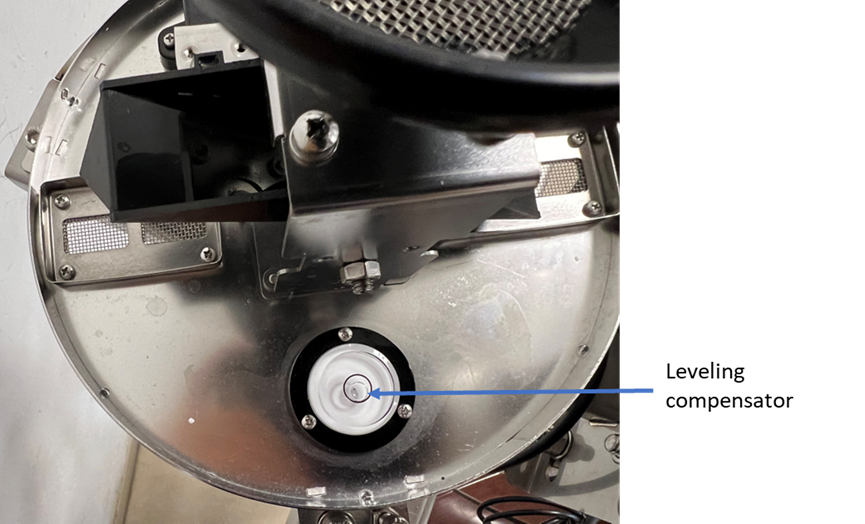
Install three levelling adjustment screws (m6X16) and screw nuts. Adjust three screws to let the bubble of levelling compensator locate in the centre.
-
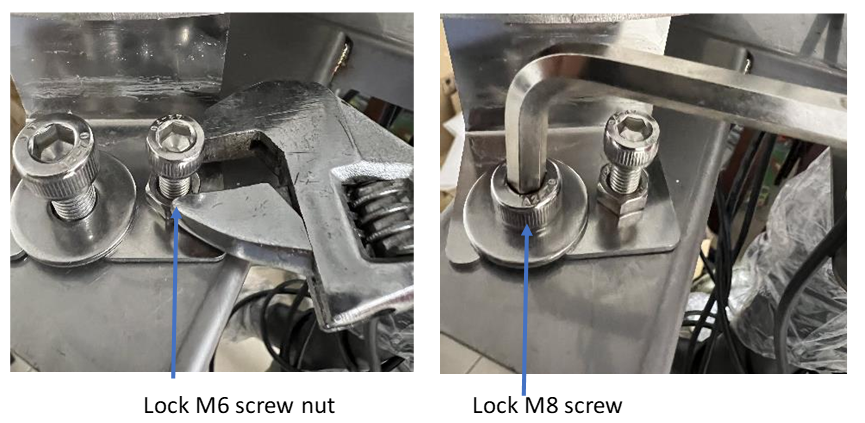
Then tighten the 3 of M6 screw nut of adjustment screw with wrench and also tighten M8 screws with 6mm Hex key.
Remark: Pls. do not use too much force and avoid deformation of three legs of rain gauge
-
Install back the bucket of rain gauge with three screws which have been removed in previous.
-
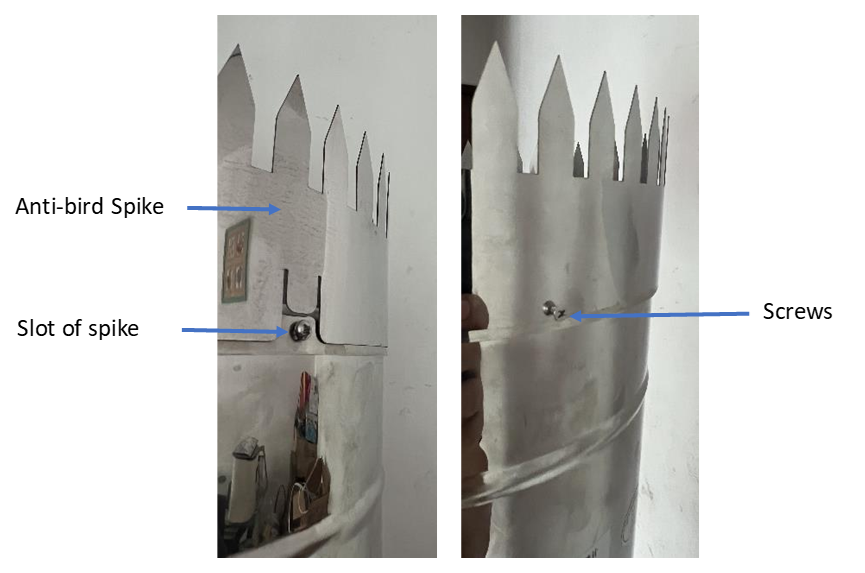
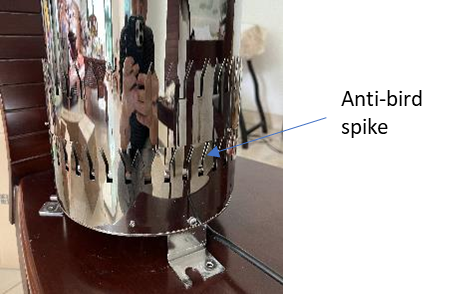
Install anti-bird spike and tighten three set-screws. Three slots of anti-bird spike should be located at the screws position.
|
STEPS |
|
|
|
|---|---|---|---|
|
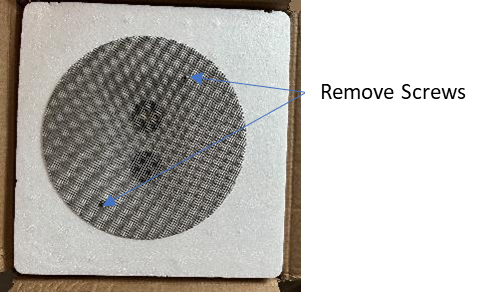
Step 1 |
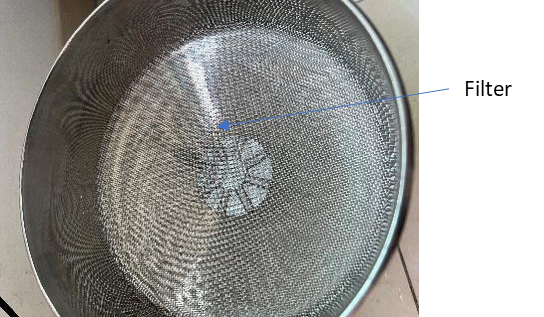
Remove two screws which mount the filter on the top foam |
|
|
|
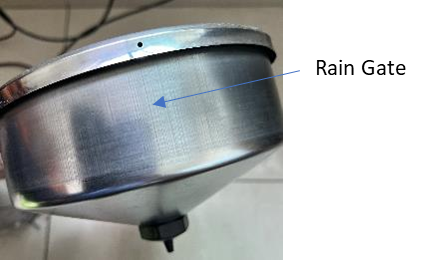
Step 2 |
Loose three screws and remove the rain gate |

|
|
|
Step 3 |
Loose three set screws of anti-bird spike and remove the anti-bird spike out from the rain gaue. (Just loose the set screws and not remove them) |
|
|
|
Step 4 |
Install back the rain gate to the rain bucket and match three screw holes, then tighten with three screws. |
|
|
|
Step 5 |
Put the filter into the rain gate. |
|
|
|
Step 6 |
Install anti-bird spike and tighten three set-screws. Three slots of anti-bird spike should be located at the screws position. |

|
|
|
|
|
|
|
|
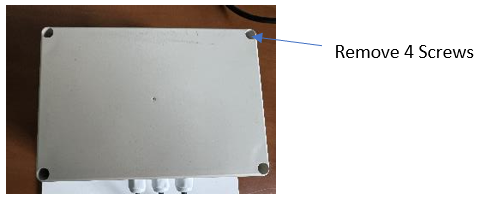
Step 1 |
Remove the top cover from the junction box through loosing 4 screws. |
|
|
|
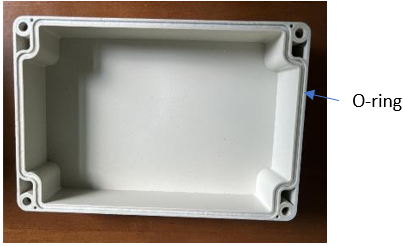
Step 2 |
Inspect the O-ring is well seated on the slot of top cover. |
|
|
|
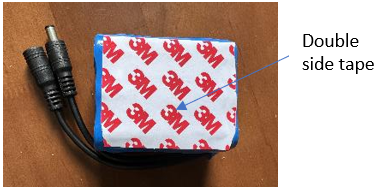
Step 3 |
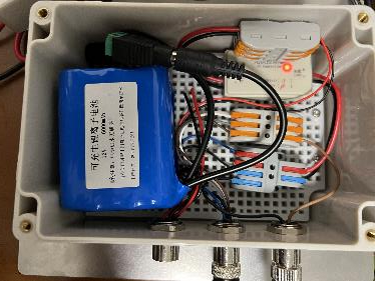
Paste double side tape on the battery pack and peel off the release paper. |
|
|
|
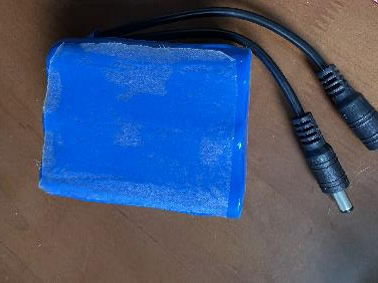
Step 4 |
Install the battery pack onto the supporting plate of junction box and fix it with double side tape. Also insert the DC connectors (male of sollar controller to femal of battery). After connection, the Battery light of solar controller (right light) should be "ON". When the solar panel is facing up to the light, the solar light of controller (left light) should be "ON". |
|
|
|
Step 5 |
Install back the top cover to junction box. |
|
|
|
Step 6 |
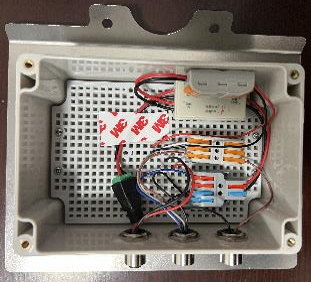
Cable connections refer to right photo. |

|
|
This Knowledge Base document is where we can track our customer feedback and use
the information to improve our product support documents.
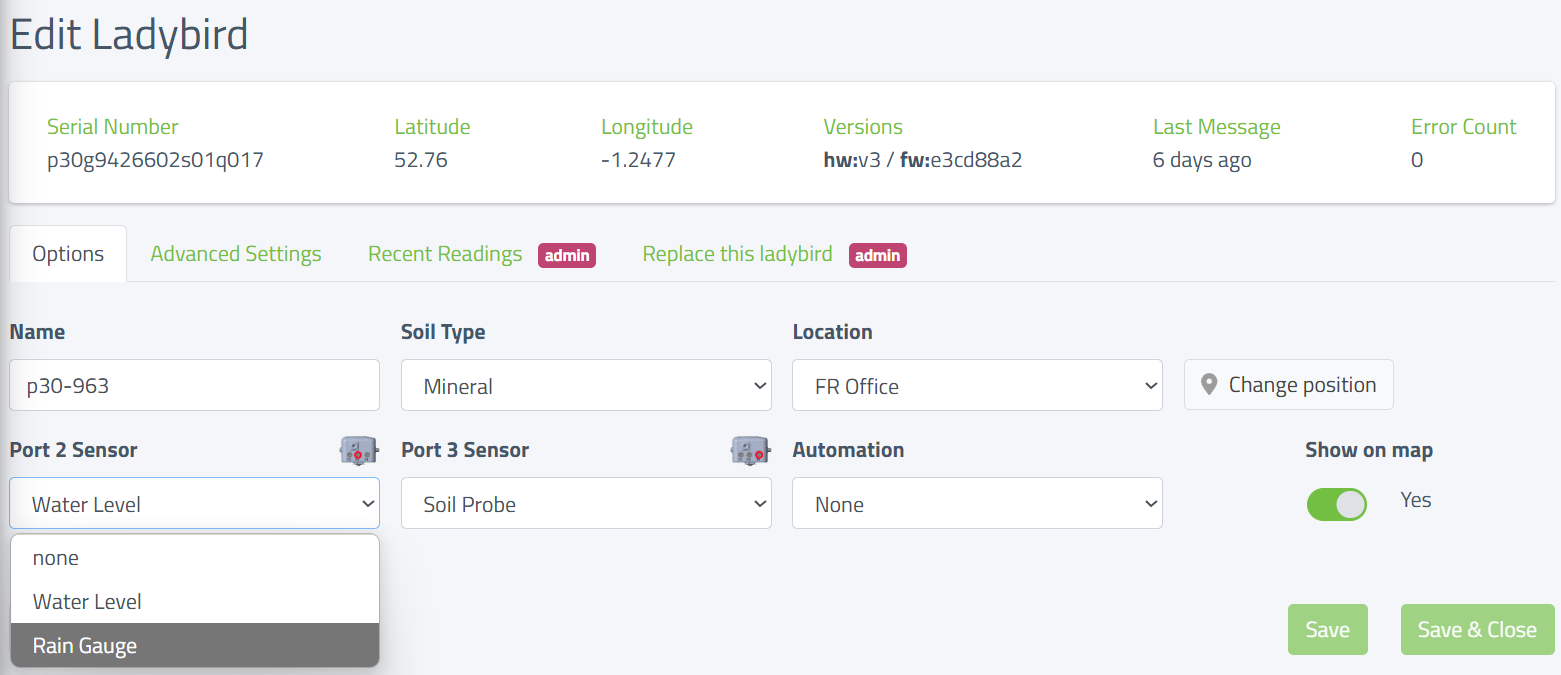
Connection to the Ladybird
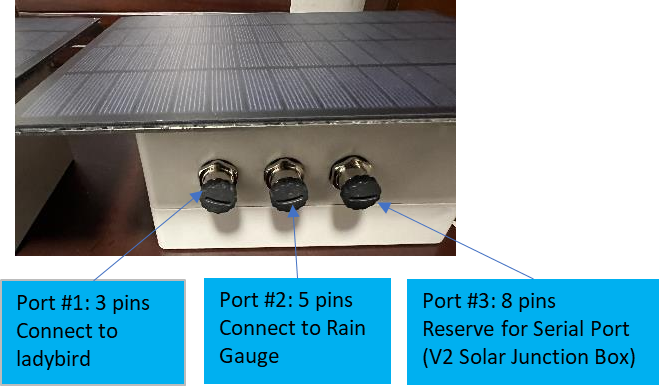
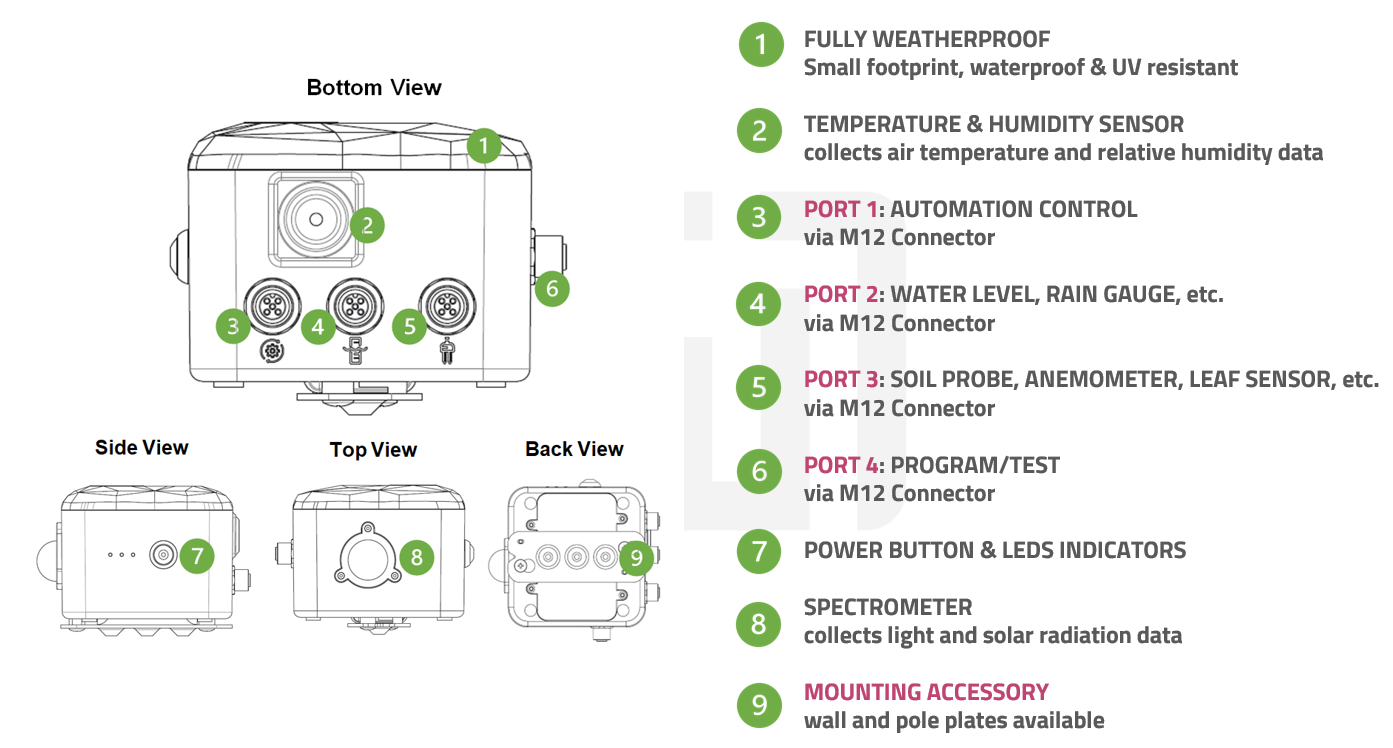
The rain gauge is connected to Port 2 (Middle Port) the same as where the water level sensor would normally be connected.
From the Dashboard click on the Ladybird you want to edit and select
System | Configuration | Ladybirds
The following window will be displayed.
Click on Port 2 Sensor and change the setting from none to Rain Gauge and then click Save.
Maintenance of the Rain Gauge
The function of the rain gauge will be significantly influenced by pollution of the funnel or the
tipping bucket mechanism. Regular check and, if necessary, cleaning is required. The
maintenance interval depends very much on local conditions and also on seasons (leaves,
pollen, etc.) and therefore cannot be exactly defined here (it may be in the range of weeks).
-
Only clean when obviously polluted
-
Avoid moving the tipping mechanism (otherwise wrong counts will occur)
-
Use water, soft cloth and / or a soft brush for cleaning
-
Unlock funnel by turning it to the left and lift it off
-
Clean funnel, specially the sieve slots
-
Check the inside of the rain gauge module for pollution, especially for spider webs
and insects, if necessary, clean it -
Check tipping bucket for pollution, if necessary wash carefully with clean water.
Caution: each movement of the bucket generates a counting pulse and thus may
cause faulty precipitation amounts -
Check water drain, clean if necessary
-
Put funnel back in place and lock it by turning it to the right